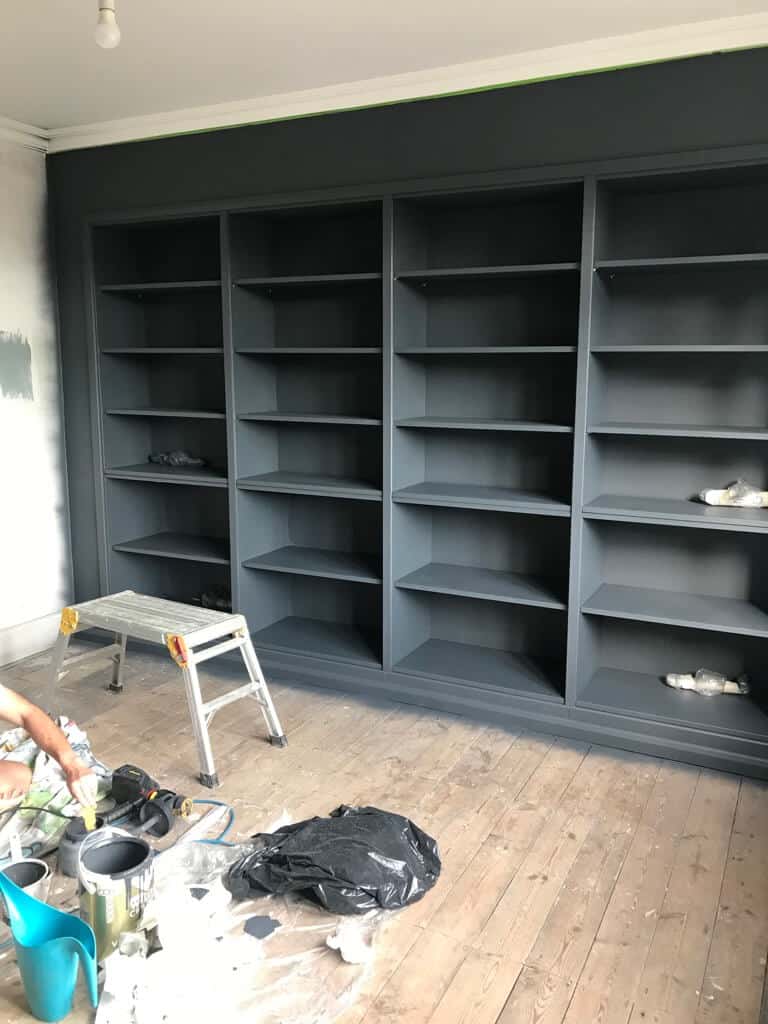
Who doesn’t look having a classic bookshelf as a backdrop to their office or living room?
The only challenge here is that built-in bookshelves like HEMNES can cost you quite a hefty sum.
But luckily, with some DIY skills and IKEA magic, you’ll be able to build a built-in bookshelf using the incredibly versatile IKEA HAVSTA unit.
In this guide, you’ll find a brief overview of the process, including all the materials and steps needed to make this amazing transformation. Let’s dive right in!

A STEP-BY-STEP GUIDE FOR THE IKEA HAVSTA HACK
Here’s a simple breakdown of all the necessary items, materials, and steps to get the job done!
IKEA ITEMS USED
The key item for this project is the IKEA HAVSTA storage combination. You’ll need 4 of these units to create a proper bookshelf. Here’s what a single unit looks like:
Watch the transformation on our Instagram.

HAVSTA storage combination | Photo: IKEA.com | Buy on IKEA.com
OTHER MATERIALS AND TOOLS
Besides the HAVSTA units, the following items are necessary to help you get the job done. I highly suggest you have them ready before you start to save the back and forth:
- MDF sheets (enough to cover the entire wall for the best results)
- Electric saw (you can use a regular one but that would save you a lot of time)
- Drill
- Screws
- Decorators caulk
- Wagner paint sprayer
- Paint primer
- Paint
- Varnish
- Door handles
IKEA HAVSTA BUILT-IN BOOKSHELF HACK INSTRUCTIONS:
With everything ready to go, here’s what you need to do to turn the HAVSTA units into a built-in bookshelf:
1. Assemble the IKEA HAVSTA units. (We decided to omit the back lip of the shelf. Refer to the photo above of the original HAVSTA to see it.)

Related: IKEA HEMNES built-in: Trim and moulding does wonders
2. Screw the units to each other, then place an MDF piece across the bottom to create a uniform-looking “plinth”.

3. Add the MDF sheets to each side and across the top of the units using batons.

4. Add the coving across the top so it looks like a continuation of the wall.

5. Use decorators caulk to hide all the joints.
6. Next, remove the doors for ease of painting.

7. Prime the units and mdf. (You can use a paint sprayer or do it by hand.)
8. Paint the entire unit. We used a sprayer and saved loads of time.

9. Seal the paint using a clear paint varnish.
See Also: BUILT-IN HACK TURNS BILLY BOOKCASE INTO A BESPOKE DISPLAY CABINET
10. Put the doors back on.

11. Add new handles.
With that done, your new built-in bookshelf should be ready!
FAQs
HOW LONG DID THE BUILT-IN BOOKSHELF HACK TAKE?
The project took around a week and cost about £1,200.
WHAT WAS THE HARDEST PART ABOUT THIS HACK?
The process is surprisingly easier than you think. But if we had to pick, it would be realising we needed a primer after we started to paint!

WHAT TO PAY SPECIAL ATTENTION TO?
Take time to practice using a sprayer before starting as there is a bit of a learning curve to it.
LOOKING BACK, WOULD YOU HAVE DONE IT DIFFERENTLY?
Sprayed the whole unit with a primer first!
ARE THERE ADDITIONAL HAVSTA IKEA IDEAS THAT WE CAN TRY?
Absolutely! The Havsta is extremely versatile and can be also used in various projects, such as built-in wardrobes and storage units.
If you’re interested in watching the full transformation process, check out our Instagram!
~ by Jo @thenewfrontwall


