
This is my version of a quilting cutting table island to look nicer for me. I was moving into a huge new quilting studio space and I knew I had lots of space to play with. So what I did was I wanted a table that was very big and tall because of my back pain I get from bending at a angle. So I wanted it tall. I first measured how tall my last island was and it was about 36-37 inches tall so I wanted about that. I then measured how long my huge white cutting mat was length and width. So I knew I wanted this table top to be way bigger then that so I had space for more and I can really use the whole cutting mat. So to start I had 37 inches height, 70 inches length and 35 inches wide AT LEAST.
So I had my husband pick up 2 KALLAX 502.784.82 in birch and then 1 of KALLAX 402.758.13 in birch. You can get other colors. Some other colors may cost more.
Then I found 8 wheels at cheaper discounted hardware store for $3.99 each with swivel and locking push down button in 3 inch wheel.
I then went to a hardware store and I knew I wanted 2 big boards nicer then plywood and nicer top but I also didn’t want to pay a ton. Another store didn’t have super wide melamine boards so I found out a different one did. I got 1 in black for my top and one in white for my bottom. 49 inches x 97 inches is $22.98 and black is $35.98 and this was for 3/4 inch thick board. Melamine board is the same as some nice shelving you get for your closets that are nice and smooth surface. And so this is what I wanted. But the store would not cut it for me to a smaller size so that I had to figure it out. I paid and had them load these carefully because they are very heavy and to get no scratches you need at least 2 people to lift it into a truck and protect it. I had a blanket in the car that helped. So I also bought 2 packages of colored banding for these boards. One in black and one in white.
I had some permanent glue at home so I could glue this on at home. There is a tool they sell for you to trim this banding to the edges once you have it all glued on but I will have to get that at a later date. Anyway I glued black on the black and white on the white. Each package ran under $5.
On the way home I stopped at my local lumber yard and asked them if they would cut these for me to a size because honestly I don’t trust my husband to cut these cause I know my husband he would ruin it hahahah plus our saw wasn’t that good. They said yes and the guy was very helpful and he helped me get them out and cut my white 40 inches by 80 and my black 80 inches x 48 for a clean edge. He did a great job and only charged me $5 to cut both boards. I was very happy.
I got home and I put all 3 IKEA cubbies back to back and I laid my white board on top so I could trace each wheel bracket with a pink sharpie. I traced on the outside and the holes on the inside. I needed to do this so I can drill the holes in the right places.


I did buy bolts to go all the way through and had nuts that came with the flat head machine chrome screws. I choose 1 1/2 inch screws. I later wished I got smaller. But that’s ok. I then got BLUE painters wide tape and put a strip over each hole to be drilled. I then put the point at the bottom of the inside of each hole. Note the blue painters tape helps to not ruin the board when you drill and the bright pink sharpie so I can see through the tape. I drilled all 8 wheels of holes, ripped off the tape and I put on all the wheels and bolts and nuts. I then glued on the white banding on all the rough edges paying close attention to remembering I had this upside down and needed to remember which side was going to be up with it is flipped over. Finished this and went on.
I then had hubby help me flip this heavy board over and I noticed because of my bolts sticking out it wasn’t a flat surface. I’m just a woman quilter, I’m not a wood worker so of course I maybe could of done this different but hey I made it work. I found some old bunk bed wood plank boards we had saved that was just perfect height to go next to all these bolts and the cubbies would sit on all these.


I laid the cubbies on top and then I put the black top on and glued the colored banding on this too. Once that was done I put it right side up on top of the cubbies. I used the felt circles that came with the KALLAX to stick to all corners and areas that the black board would sit on, I did not screw on the black melamine top. I did this on purpose because what if I wanted to later change the birch cubbies to red ones. Couldn’t afford the red ones at this time, I then used my red cubby baskets I had on my Expedit cubbies and decided to put these under and wow did that make this pop.
I still have to buy 6 more red baskets to fill all the cubes. As you can see it came out great and once I filled each basket with my quilting fabric scraps and I filled them all FULL the weight of all of them helped keep this island more heavy and stable. Now when I want to move it I’m just really careful. I don’t have to worry too much about it all moving on my hard wood floor (laminate) because this is VERY HEAVY. But I don’t plan on moving it much. Now why do I have wheels if I don’t plan to move it much. Well if I ever needed it to push against my sewing table to help when I have to quilt a big quilt I could. It is 37 inches tall but my sewing table does raise higher to this height too if I needed to. Plus if I ever rearrange my furniture in the sewing room I can put it anywhere.
Anyway the melamine I really love and that’s what I love with the looks of the red. My quilter friends can’t wait to come over to use it with me. And i can say I did this all by myself with SOME lifting from hubby and others that was very helpful. HOPE you love it as much as I do.


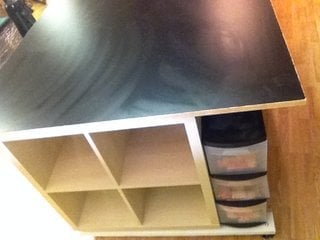
I also had some space and put some IKEA see through drawers stacked on the side – note the final picture shows the IKEA ones. I switched out to these once I noticed they would be better there (designed by Henrik Preutz) large size. Don’t have store number anymore. But I use these for spools of threads.
Thanks for reading and hope you will make one to your own liking like this to your own needs. Have a happy quilting day.