
This one is going to be about hacking the FORHOJA (fhqwhgads). At first glance it isn’t too much of a looker, and I really wanted to put my liqour in it, so I took a look at a possibility (John Booze Maleficent Karting), and figured why not?
Here is what the Island looked like in my cozy little kitchen before the hack.

Not terrible, and honestly I was considering not changing the island. However after a week of pouring drinks, it was getting REALLY old having to tilt the vodka in and out to refill the goblet. So I was back in full force today to resolve this horrific problem.
First step is to pick up a set of 1-1/2″ x 3/4″ L-brackets at your local hardware store, I found mine at Lowes. These are going to be used to ensure that the sides of the island will not separate from the center portion. If you are already going to IKEA to pick up the FORHOJA, or have one decently close, also pick up a KVARTAL Miter box and saw. If you already have a hacksaw and miter box you will not “need” this, but it comes in surprisingly handy as you’ll see later. Plus it is only $4.50, so why not?

==It came with screws, and they will work if you are slow when you tighten them in place.
(If you have yet to assemble your island then you can skip this step) If you already have the island assembled you need to take off the side of the island that you WANT TO HAVE THE DRAWER ON in my case I wanted it to be the wheel side as it is closest to the range. In all honesty it does not matter which side that you choose to remove, but if you do it that way you only have to remove one side.

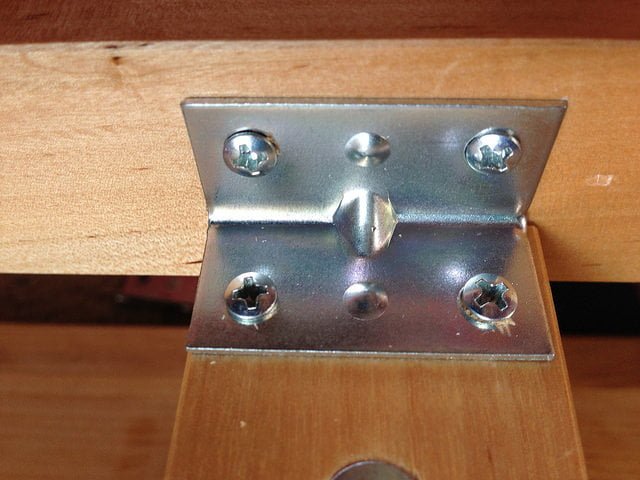
Next, take the uppermost portion of the island (where the shelf pockets are), and screw the L-brackets to the underside. Be aware that you should go slow when tightening the screws down. The core is very soft so you shouldn’t have any problems or cracking, but it is still a good idea to take it slow. When in doubt, after a good turn back out the screw a smidge and then tighten in farther. While you are tightening down the screws be sure that the joint between the middle support and the side supports are tight, this way there will not be a gap between then when the time comes to put it together. This step can be done before step one if it is already assembled, and it might be easier to keep the gap between them tighter this way, albeit a bit more awkward to do so.

Now that you have that together, bring out your KVARTAL hack saw and miter box and place it against one side of the center support.

The reason why it was semi-important to get this $4.50 hacksaw and miter box is that is magically places hacksaw in line with the cross brace! Ridiculous. Couldn’t have been better planned out, and I was even surprised at this one. Heck I only picked it up because I was not sure if I had one in the garage.
So make your cuts to both sides of the top portion, and then look at the soft wood beneath the veneer.


It would be a good time now to lightly sand the corners and clean up the cut.
Now follow the directions in the manual to assemble the cart, or if you already had it assembled be sure to put this top area in place before you put the actual top back in place.

The hack is now complete, and I have an easy to access place for my wonderful beverages.
One thing I am now on the lookout for is a couple surface mount bars that will be used to hold dish towels to cover up the tops of the bottles and to add a bit more color to the kitchen. Also if you are wondering why the mirror is so high it is because I am 6’7″ and I HATE mirrors that I have to duck down to use.

-’til next time