

Materials: RIBBA Picture Frame
Description: I wanted to make a digital picture frame of sorts, but not in the traditional sense. So I set out to build a cheap yet awesome looking case for the Raspberry PI computer that houses my photo gallery.
This hack requires a very short (and cheap) list of items:
A 5×7 RIBBA Picture Frame – $1.99
#4-40×1/2 Machine Bolts w/Nuts – $1.20
Black Foam Board – $2.80
White Glossy Poster Board – $0.25
Grand total – $6.25
Obviously you also need a Raspberry PI but I assume you already have one if you are building it a new home. I personally also use a wifi dongle to limit the total number of wires coming out of the frame.

To build:
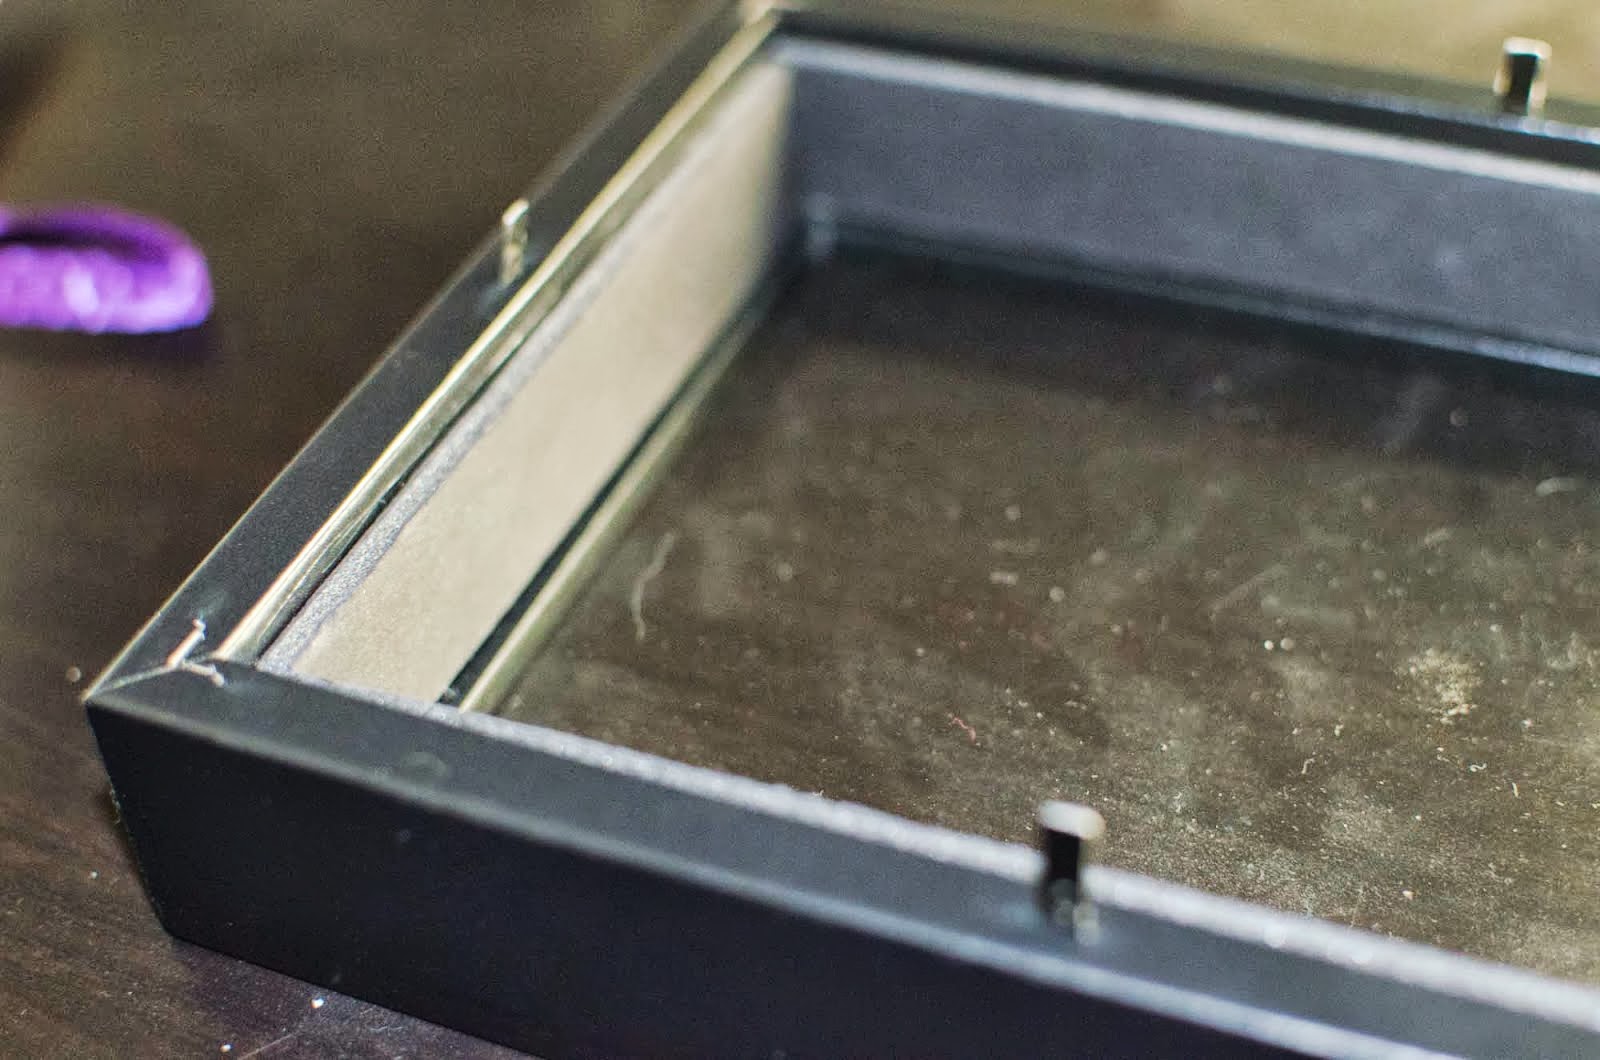
1. Disassemble the frame and remove the bendy tabs that hold the backing in place with a pair of pliers. Do this carefully so as not to break the frame or the tabs as we will be reusing them.
2. Cut 4 strips of foam board at 7/8 of an inch wide and the same length as the inside of the four walls of the frame. If cut well these strips should hold themselves in without the need of glue.
3. With a small hammer gently tack the four tabs into the back of the frame. These need to be close to the inside edge so that once we reassemble everything they can be bent down to hold the backing in place.
4. Put the glass back in the frame and arrange the foam around the outside edge holding it in place. There should be about 1/8th of an inch difference between the outside of the frame and the outer edge of the foam. This will hold the backing away from the glass.
5. Glue the backing down to the glossy paper and then cut around the outside with a sharp blade. I used some cheap stick glue and it worked just fine. Optionally, also glue down the matting to keep it from moving.
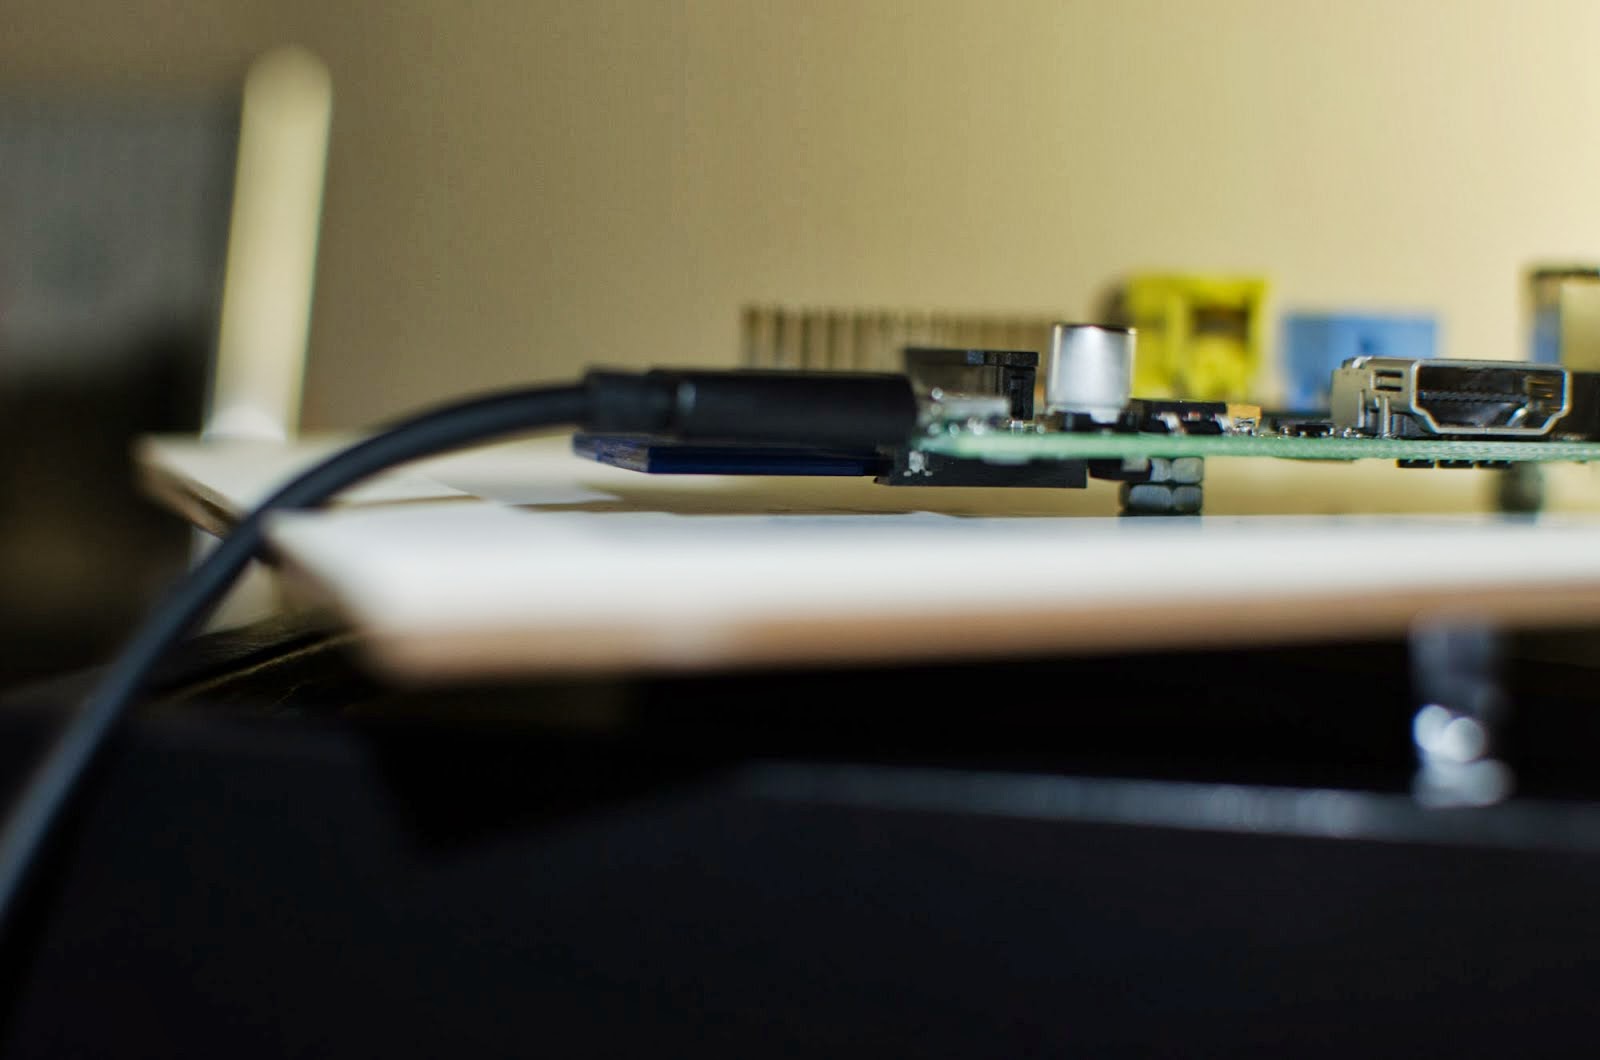
5. Using a small drill bit (I didn’t even use a drill) drill two holes in the backing that line up with the two holes in your raspberry pi. I started with a 1/16 to pilot the holes and then used a 3/16 to match the size of the machine bolts.

6. Place a machine bolt through each of the raspberry pi mounting holes and hand tighten on two nuts. These will act as risers to keep the board elevated away from the backing. Do not tighten the nuts as this bolt needs to turn freely to screw it through the backing.
7. Using a small screwdriver, screw the raspberry pi assembly to your backing/matting combination. If you used the 3/16th drill bit it should actually screw in to the cardboard and eventually stop. Do not torque the bolts. You can optionally add nuts to the back for extra security as I did.
8. Notch the outside edge of the backing to allow a USB cable to pass through to the outside of the frame. Do the same on the other side if you are using ethernet instead of wifi.
9. Reassemble the frame and carefully bend the tabs down to hold the backing in place. They are probably not as secure as they were from the factory but they should hold just fine.
10. Take pictures and store them on your new Digital PI-cture Frame.
I think this case turned out looking very nice. Its low cost and do-it-yourself nature should resonate well with the raspberry pi community. You also only use a fraction of the materials and could easily make many of these frames with the leftovers.
~ David Parks, United States