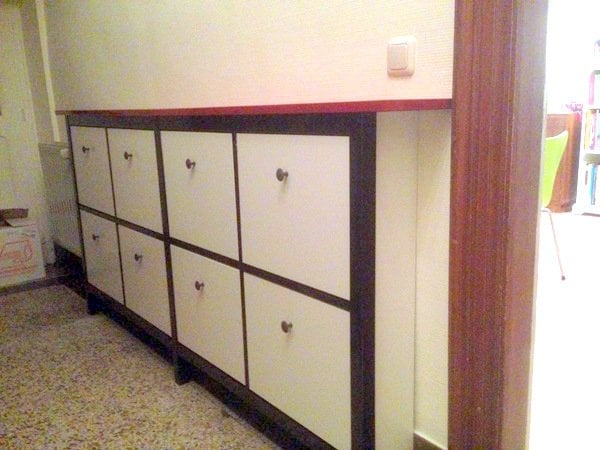
Do you remember the inspiring ScrapHacker’s idea “HEMNES gets a double topping“? Well, I’ve made some improvements to the double HEMNES shoe cabinet and gave it a cleaner finish where both sections meet.
Materials:
- HEMNES shoe cabinet
Twinned HEMNES shoe cabinet instructions:
I’ve decided to use it in my hallway, following the anonymous comment of removing one of the “sides” in the middle.
Actually, instead of that, I’ve decided to keep both inner “sides” and I’ve removed one of the inner columns, as you can see in this photo.
First of all, I did 4 mirrored holes in the rear side of the central column.
Remember, the front side can not have any holes. Then I did the 10 holes in the opposite lateral side of the column.
So, I mounted the HEMNES as a single shoe cabinet with 3 legs.
Finally, because I don’t consider myself a handyman and I don’t even have a handsaw, I’ve kept untouched the two original top plates.
Therefore, the two twinned top plates have a bit of an overhang on each side of the cabinet as you can see in this final photo.

Last tip: according your firefighters, keep in mind you have to respect the hallways’ standard measures.
So, ScrapHacker, you may be glad of being inspiring to someone else: me!
I hope your hack can still be helpful to more people.
~ Paulo, Canada
Here’s yet another version
Materials:
- HEMNES
I followed the footpath of ScrapHacker (Stockholm), Paolo (Canada) and Grace Wang (UK) to create a customized, double-sized HEMNES shoe cabinet that matches the colors of the black-white-red terrazzo floor of my hallway.
First repainted the legs, frames and the top.
After a very light sanding on the factory paint job, I used Sparvar’s grey spray-based primer. It dries quickly and provide a nice surface to work on.
Then I used Alpina’s XT high-gloss oil-based enamel with paint rollers to achieve a shiny surface. I used black on the legs and the frame items, and burgundy red on the top to create a “Mondrian-esque” look.
The surface is not 100% blister-free, but it will do in my relatively dim hallway.
I let the enamel to cure for 2 days, and assembled the two cabinets using the “Paolo-Grace method”, i.e. using only one of the pillars in the middle position.
I was a bit afraid that I may not be precise enough when replicating the holes of the other pillar, but it was not that difficult after all, and I had no problem with the assembly.
Just like the others, I did not shorten the top boards, as I had enough space for the extra overhangs. I fixed them to the frame using the 8 screws that are in the package, and did not bother replicating the holes for the pins and wooden bits. For the screws you do not even need to drill the top board – it is soft enough to turn the screws in using an electric screwdriver.
So far I am happy with the result. I am really curious about how the paint job will withstand the wear and tear on the long run.
Thank you for the inspiration.
This post was updated to consolidate different versions of the same hack.


