Monday, September 03, 2012

Mid-Century Lack TV Hack


Materials: Lack TV stand, four mid-century legs, wall pop stickers (orange), plywood, foam board

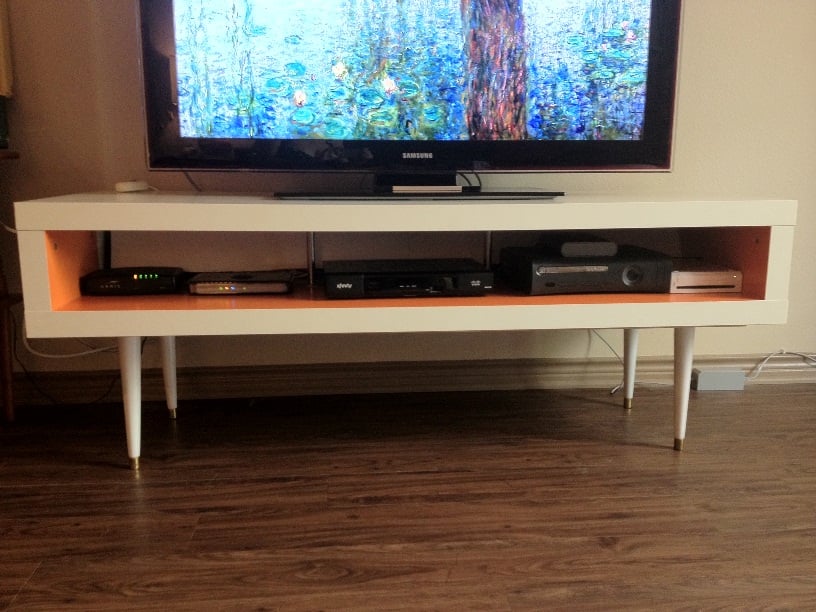
Description: I submitted the Fullen Bar hack a while ago, and since I am never satisfied with my living room, this week I decided to tackle my lack TV stand. I recently "inherited" some mid-century furniture legs which I used to replace the short, chunky lack legs.

NEW LEGS
- The lack TV stand particle board was not strong enough to hold the screws for the new legs so I had a half inch thick plywood board cut to 54"x18".

- I attached the legs to the corners of the board, making a bench.

- I then attached the Lack TV stand to the plywood bench with three inch screws.


CABLE HIDER
- I wanted to hide the cables from the cable box and the other devices so that they wouldn't hang under or clutter up the inside of the tv stand. Before attaching the top panel of the stand, I cut a piece of white foam poster board into two 5"x27" pieces which I taped together to make a long 5"x54" piece.

- I attached the foam poster board strip to the underside of the top panel of the TV stand (the unpainted side), creating a little wall to hide the cords behind. I centered the poster board strip and secured it with packing tape, perpendicular to the top of the TV stand, six inches from the back (the side that would face the wall).

ORANGE INTERIOR
- Rather than paint the inside of the stand orange, which would scratch easily, I wanted to use contact paper, but I couldn't find it in orange anywhere. I found striped, orange wall decals online instead. It came as a narrow roll of sticky paper that was easy to apply that could be re-positioned. It also won't leave a residue if I change my mind about orange later.

- One roll of the wall decal stripe paper was only enough to cover half of the interior of the TV stand. Since the back was covered by the poster board, you can't see that the rest of the interior is still white.

~ Heather S., Houston

9 comments:

  1. This is really really cool!! I LOVE it with the '&' light!! Slick job.

    ReplyDelete
  2. very nice reminds me of my youth! lol Do you make house calls? I am in San Marcos :)

    ReplyDelete
  3. This looks pretty awesome, nicely done.

    ReplyDelete
  4. Can you give us any more info on that awesome ampersand light in the background?

    ReplyDelete
  5. Thanks Jeremy! I actually made the ampersand light. Urban Outfitters has one that's similar, but I thought it was a might pricey at $200+. I loosely followed the Vintage Marquee DIY on ohhappyday.com. Rather than use poster board I used plywood and roof flashing for the sides (very sharp and not super pliable). They sell round light bulbs in the gardening section at Target so I just measured those to figure out how big the holes should be.

    ReplyDelete
  6. I once had a giant Sony rear projection TV. After 13 years of faithful service, it died. I figured it didn't owe me any money. Went to the store and bought a new giant Sony RP TV. What to do with the old one? Pay somebody to haul it away? Instead, I took it apart, and converted it into a stand for the new TV. Chopped the sides down and re-mounted the top to the shortened sides.

    ReplyDelete
  7. Can you tell me more about the legs? Where did you buy it? I just cant find them where I live.... please !!!

    ReplyDelete

Everyone is free to comment but IKEAHackers.net reserves the right to remove comments that do not contribute constructively to the discussion, contain profanity, personal attacks or seek to promote a personal or unrelated business. SPAM will be deleted.

If you have a Blogger profile, you can click on the SUBSCRIBE BY EMAIL link that will show up below and receive all follow up comments on the hack via email.

Don't have a Blogger profile? Create one for free here so you won't have to be be listed as "anonymous".