

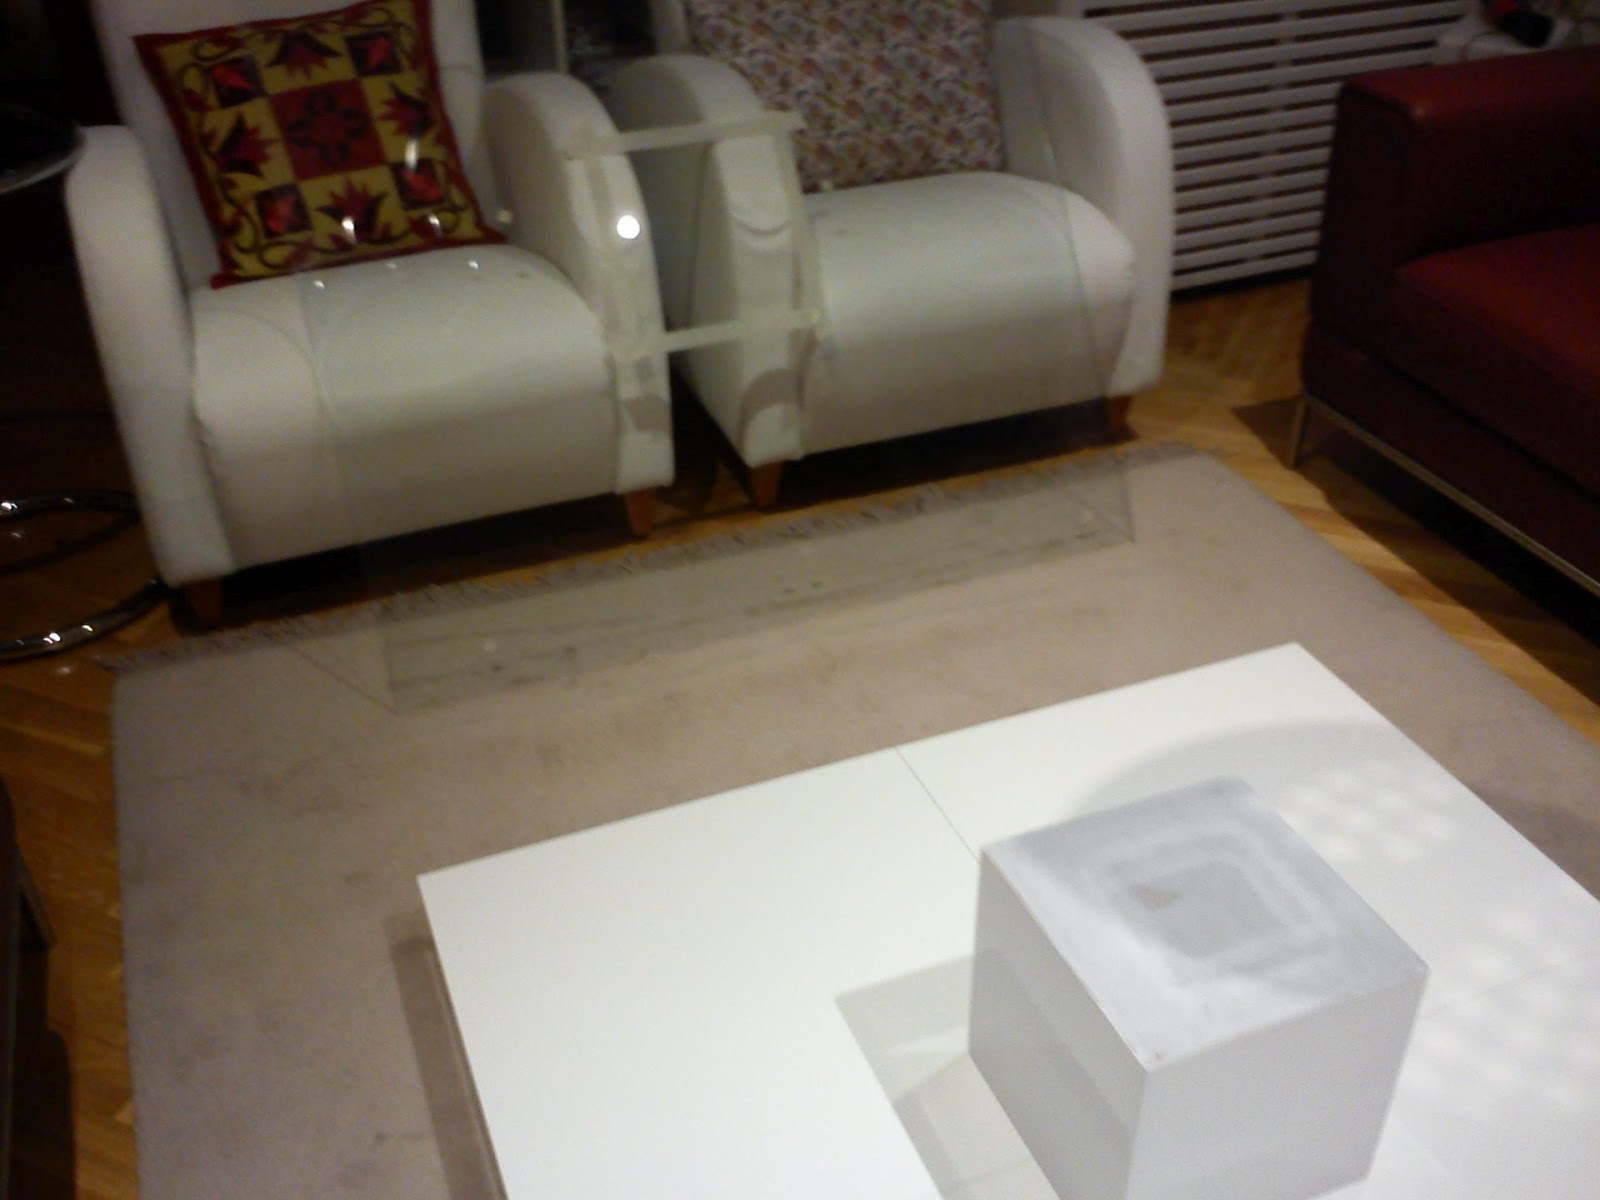
Description: What I’ve tried with this hack is to copy a square coffee table that I’ve seen in shops but that is way too expensive for me (around 1.000 euro with the size and the glossy white finish I want). Its design is minimalist: a glass top resting on a wooden cube. The cube is placed in the center of a thick square 110×110 cm. board that acts as the table base.
I’ve used 4 Ikea LACK side tables for the base and screwed below a piece of PRAGEL counter top to reinforce the structure. This is the final result, with a total cost of around 250 euro.

These are the steps I followed to build the table:
Step 1
Bought 4 Ikea LACK side tables. I got the glossy version, that is three times more expensive than non-gloss, but even so they were cheap (13 euro each). I set the four boards of the tables forming a square and joined them with tape. Screwed them underneath in pairs with four small metal sheets. Warning: LACK tables are mostly hollow, so you have to ensure that screws go through not-hollow areas. Now I had a square base of 110×110 cms and 5 cm thick, ideal for the looks of the table.


Step 2
The original table is supported by four wheels, but I preferred a more stable approach for my base. So I glued below the base a piece of PRAGEL counter top table that I bought in the as-is Ikea section. This way, the LACK tables are 3.8 cm elevated from the floor, and strongly fixed together. I used general-purpose mounting adhesive and 4 screws to fix the LACKs to the counter top.


Step 3
Now I had to make the wooden cube. To keep proportions, the dimensions of the cube had to be around 25 cm. of side. So I bought in a DIY store (Leroy Merlin) this 26cms flower pot.

I filled the pot with wood pieces 25 cm. long, glueing them with mounting adhesive, to make the cube solid enough to support the weight of the glass.


Step 4
I attached the cube to the structure with mounting adhesive and 4 long screws going from below through the PRAGEL table top and the LACK tables, screwing into the cube’s inner wood.


Step 5
Now I turned the table to its final position, to glue the glass top to the cube. I ordered a 110×110 cm glass 1 cm. thick, with rounded corners. The cost was 135 euro, therefore the glass has been by far the most expensive part of this 250 euro hack. I used mounting adhesive specific for glass surfaces, mirrors and the like.


It took several days for the adhesive to dry out.

Step 6
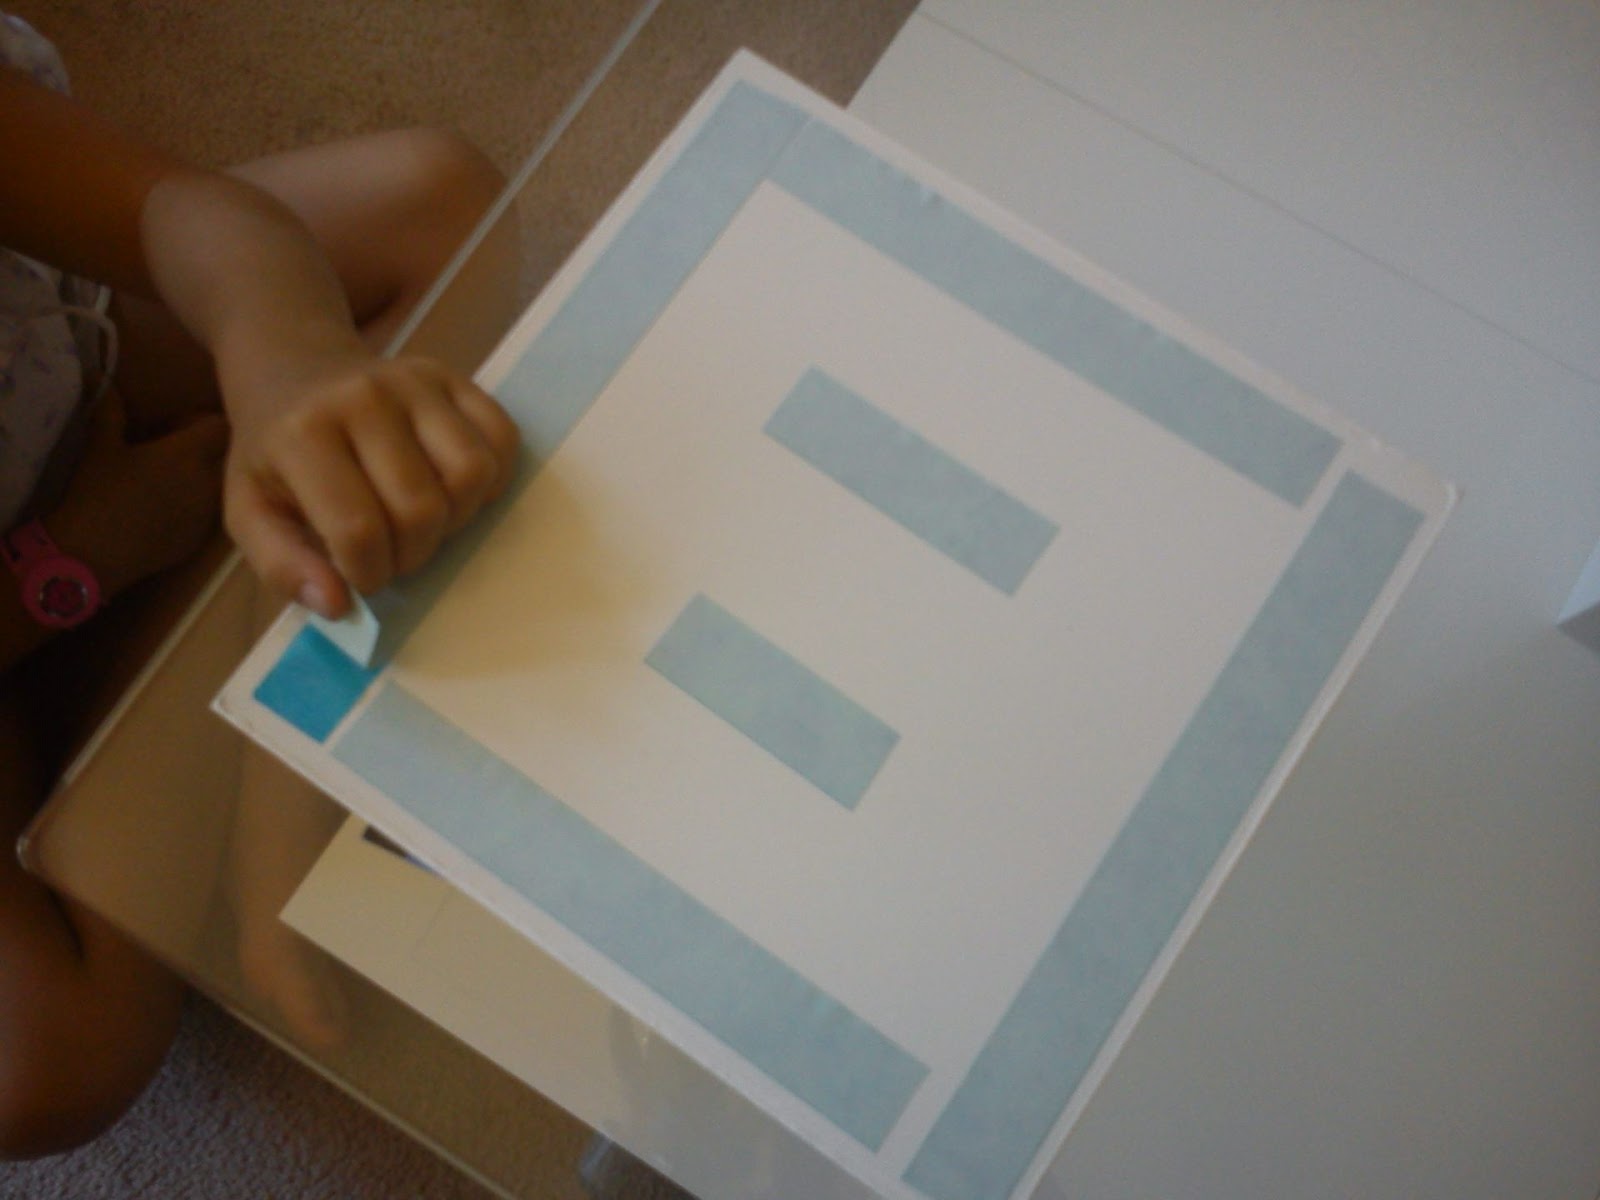
To make the top embellisher (to hide the adhesive showing through the glass), I cut a square of thin wood 27 cms. on each side. I painted it glossy-white, and attached it to the glass with double sided tape.

Step 7
Final look of the table


Note: Initially, my plan was to order the glass with some holes in the center to be able to screw it to the cube, but the the guy from the glass shop advised against it saying that the holes would seriously weaken the glass.
Before starting to use the table, I wasn’t too sure about the stability, being the top glass just glued to the rest of the structure.
But now that we’ve been using it for a month (the normal use of a coffee table, placing drinks, some bowls with food, dishes, bottles…not too heavy stuff) I can tell that the glass hasn’t moved at all and so far it has worked fine.
~ Claudia G.