

Materials: Stolmen Cabinet, Stolmen Shelvs, some planks, some metal brackets and a lot of screws
Description: So, what do you do if you have a huge Stolmen Shelve but don’t like it any more and also want to have an “easy-entry” bed? Hack em..
I recently moved into a smaller Condo and did not like my Stolmen any more. Selling it would be one idea but I found a better one.
I planned to make it into a bed.
I had one big Stolmen Cabinet and two smaller Stolmen Cabinet as well as some Stolmen Shelves.
I bought another 110cm Stolmen Cabinet, and metal brackets, tooks some of the shelves to the wood shop and cut them into 10cm strips. I also get some wood spacers with 38cm.


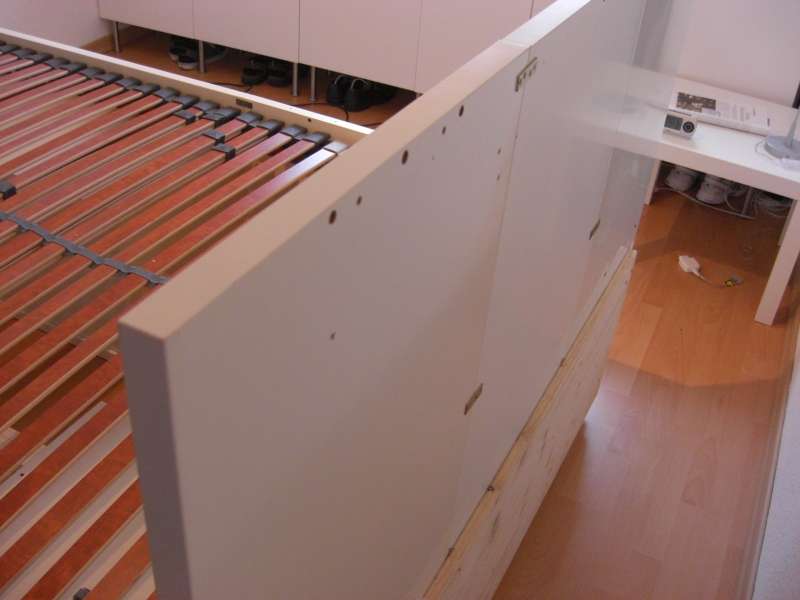
I arranged both a small (55cm) and a big (110cm) Stolmen Cabinet on each side. Three of the spacers were used to connect those cabinets to each other and a 38×55 Stolmen Shelf was used to cover the spacers up. On the front and back of the new bed i bolted a 50×55 shelf onto the cabinet.
As the Shelves are 55cm height but the cabinets are only 45cm, this makes of a perfect 10cm Frame to hold the slatted frame and mattress in place.
In order to adjust the height around the bed I get got two shelves cut at a wood shop to get four 10cm pieces to create a frame equal height around the bed.
Everything was fixed with a lot of metal brackets and screws.
Last but not least I used three 50×110 shelves and a 140cm plank to create a head board. The three shelves were laid beside each other and screwed to the cabinets using the plank for been able to fix the shelves outside their frame area.
SIDE NOTE: Stolmen Shelves have about 3cm wood frame, the rest of it is cardboard!

This head board is used to adjust the correct width of the bead on one side to fit the slatted frame, on the other side I simply use an other left over plank.
The beauty of this construction is that I could easily widen the bed from its current 140cm to 160cm, 180cm or 200cm when ever I want to by simply expanding the head board and foot plank while also adding a new middle rest for the two slatted frames instead of the same one I currently have. And this could for example be done using a 5€ Lack table that I also have in stock 😉
~ Tobias, Germany