
Materials: Rast Dresser
Description: 1) I bought 2 Rast dressers from IKEA, and assembled the tables, except for the drawers.

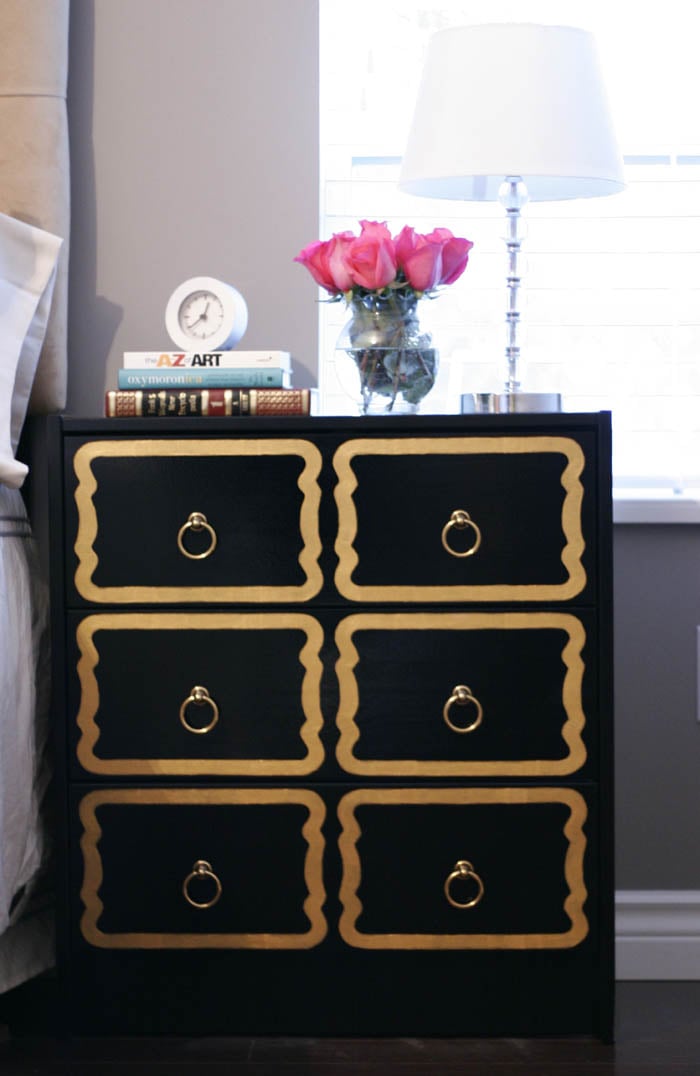
2) I primed the ‘body’ of the dresser {assembled} and the fronts of the doors and then sprayed them using RustOleum’s black lacquer spray. I did 2 coats to get good coverage.
3) I took inspiration pics from Dorothy Draper chests online, and blew them up to be able to draw the shape of the inlay on a piece of transparent paper that I cut to be the same size as each drawer. Here is where the measure-twice-cut-once rule really applies! I cut the stencil using an art Xacto knife, leaving gaps so that the centre of the stencil stayed attached to the outside. I secured the stencil onto the drawer using painter’s tape.

4) Using Liquidtex’s Iridescent Rich Gold heavy body acrylic paint, I carefully painted on the design. I removed the stencil after allowing the paint to dry for about 1 hour. I taped off the gaps that remained (due to the stencil) and filled those in. I let this dry over night and then went over the gold free-hand to make it even thicker afterwards.
5) I then put the drawers together on the built shelf, and put in some beautiful bronze ring pulls from Lee Valley Tools.

See more of the DIY Dorothy Draper Chests.
~ Nancy Marcus, Vancouver