DON'T MISS A HACK. CONNECT WITH ME.

Thursday, August 05, 2010

(Yet another) Billy built-in


Materials: 2x80x202 Billy bookcases, 3x40x202 Billy bookcases, matching Billy height extension units

Description: I've always longed for wall-sized bookshelve to my home office, so when we bought our new flat, I decided to go for it. After a bit of planning, Billy bookcases seemed the best fit. There are three 40x202 units combined with two 80x202 units with matching amounts and widths of 35 cm tall extension units. Total dimensions for finished bookshelf are 237(h) x 280(w) x 28(d) cm.


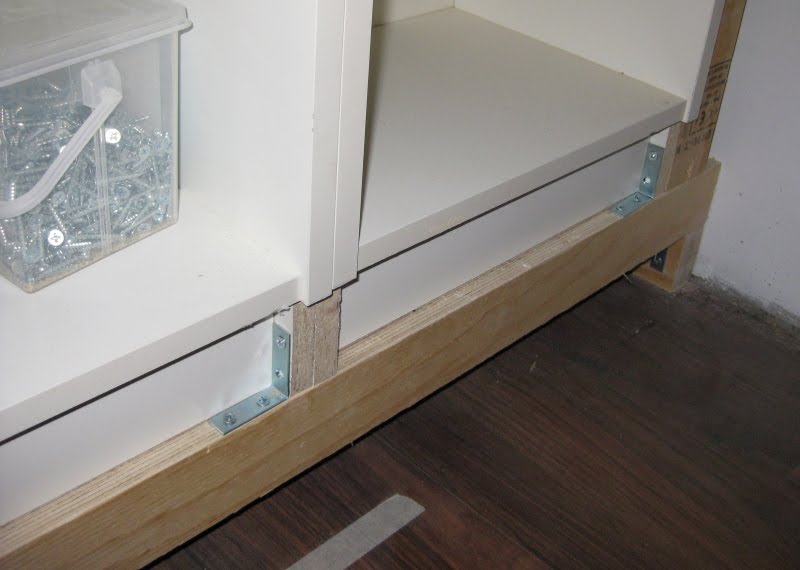
I started by building floor support from 39x66mm beams and bolting it to wall with L-brackets and two 6x60 mm bolts from five different spots. After that I added another horizontal beam next to wall to further support the weight of bookcase full of books.

I built the support to be 13mm less deep than actual bookcases, so I could cover this thing up with some drywalling. This meant I had to begin cutting brand new things with power tools. After cutting and some test fitting I attached bookcases to floor supports with aforementioned L-brackets. To permanently secure things, I built frame around assembled Billies and then bolted said frame to wall. Bookcase was then secured to the frame all around.

At this point I had yet another great idea. I decided to add two wall outlets in the middle Billy, one under the solid shelve and another in the extension part. Leads can still be seen in the final picture, electrician has since visited and connected those.

After drywalling, painting and fitting mouldings around and between bookcases, all I need is a lot of books!

See more photos of the Billy built-in.

~ Mikko

8 comments:

  1. I am planning an entire wall done this way, and instead of using the included fiberboard backing, which never lies quite flat and screams "prefab"...I intend to back them with thin panels of the same single-side-veneer plywood I used to panel the opposing wall. In the installation above, I think I would have used painted drywall as a backing.

    The correct link for more pictures is:
    http://www.puolikas.net/personal/billybuiltin/

    ReplyDelete
  2. This is awesome. I wish I was confident enough to do the drywalling. Great hack

    ReplyDelete
  3. Wow Wow wow ! good job!

    ReplyDelete
  4. Hello

    Very good work. I have a question: how do you mask the holes inside each panel?

    Thank you for the answer.

    ReplyDelete
  5. Very good question: how did you hide holes that are one the side of each pane?

    ReplyDelete
  6. Same question as Pierre-Eric. How did you conceal the peg holes?

    ReplyDelete
  7. if really interested in hiding the holes, a magic marker (or white-out, in this case) swabbed inside the holes will mask those glaring edges.

    ReplyDelete

Everyone is free to comment but IKEAHackers.net reserves the right to remove comments that do not contribute constructively to the discussion, contain profanity, personal attacks or seek to promote a personal or unrelated business. SPAM will be deleted.

If you have a Blogger profile, you can click on the SUBSCRIBE BY EMAIL link that will show up below and receive all follow up comments on the hack via email.

Don't have a Blogger profile? Create one for free here so you won't have to be be listed as "anonymous".