Tuesday, June 22, 2010
Broder bike hack
Materials: Broder Post, Height Extension and Foot, Brackets, spare 1x2" wood pieces
Description: We needed a way to store our 2 bicycles inside. We are renting and wanted something that didn't screw into the walls or ceiling.
We liked the look of the Stolman hack, but when we got to Ikea they had replaced the painted aluminum color Stolman system with a creamy off-white color that we didn't like.
We went with the Broder instead and as a bonus this is a much cheaper system - the entire bike rack cost us about $20. You'll need: 1 x Broder long post (80.25" or 204cm), 1 x Broder height extension post and foot, and 2 x packages of Broder front facing brackets.
Two pieces of leftover 1x2" wood (1.5cm x 6cm x 40cm) were slotted with a handsaw at the width of the brackets. Mounted on top of the shorter bracket, the wood forms a V in which to rest the bicycle top tube.
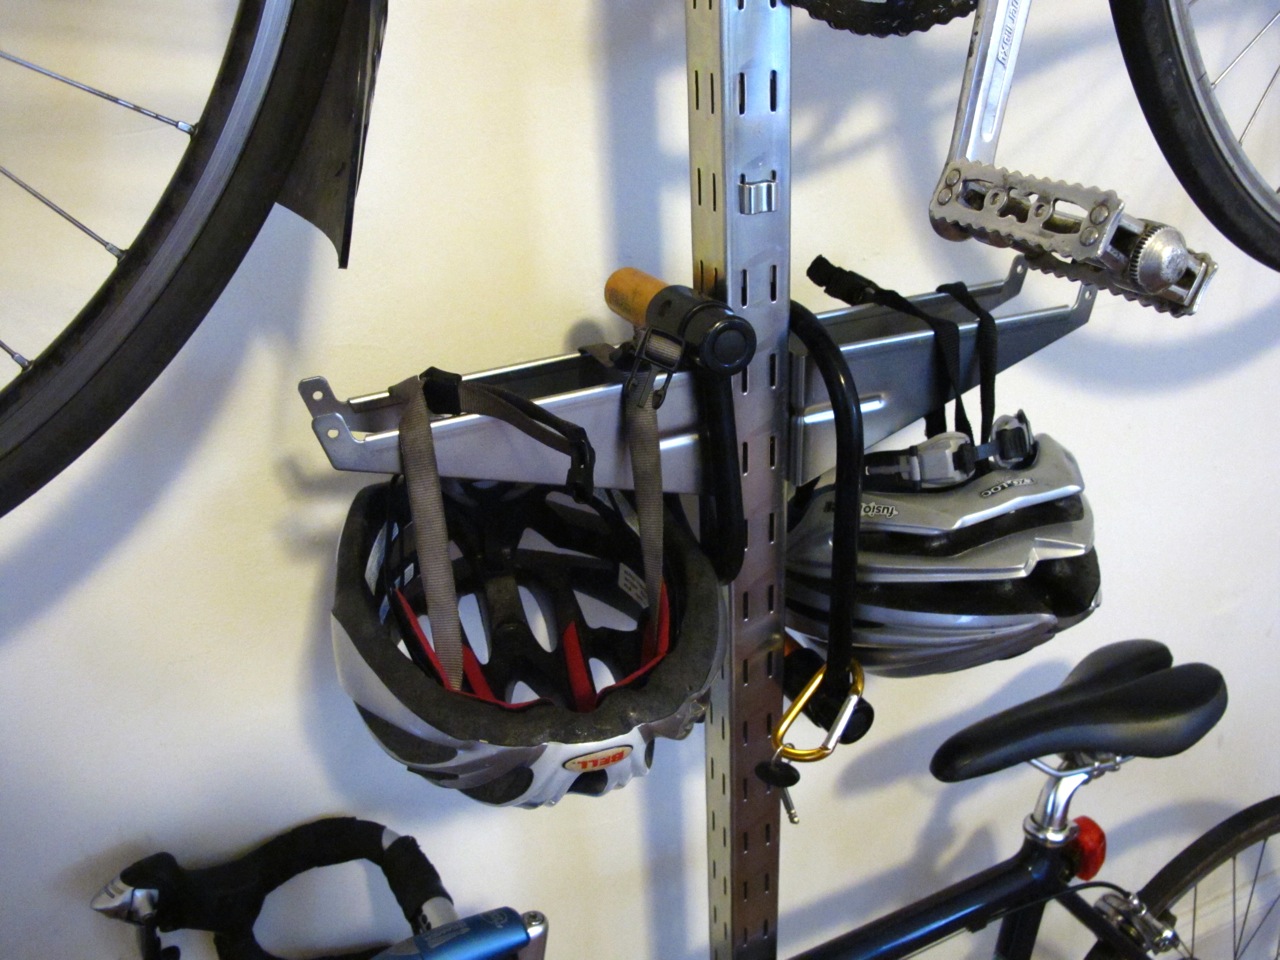
The extra, longer brackets were mounted sideways to provide hanging storage for helmets and locks.
~ Mark, Philadelphia, PA
14 comments:
Everyone is free to comment but IKEAHackers.net reserves the right to remove comments that do not contribute constructively to the discussion, contain profanity, personal attacks or seek to promote a personal or unrelated business. SPAM will be deleted.
If you have a Blogger profile, you can click on the SUBSCRIBE BY EMAIL link that will show up below and receive all follow up comments on the hack via email.
Don't have a Blogger profile? Create one for free here so you won't have to be be listed as "anonymous".
Subscribe to:
Post Comments (Atom)


This is cool.
ReplyDeleteWe might built it for our bikes at home.
Thanks for sharing.
Wait, how is it secured then if it's not screwed in to the ceiling or floor??
ReplyDeleteI've been pondering what to do for bikes in my apt also.
Exactly my thoughts - how did you secure this without using screws?
ReplyDeleteI looked at this option before. While not as cheap as a Broder, the Topeak Dual Touch stand is a smoother product with less work.
ReplyDeleteThe stand does not attach with fasteners, and the hooks are bike-specific, so the bike is cradled by padded hooks and balanced with angle adjustments. Three and a half years later, it still rocks.
The Broder system uses a compression spring system with a threaded foot (the feet are pressed upwards/downwards by the pressure from the spring). You can screw it into the ceiling if you want to, however, we've found that it is unnecessary.
ReplyDeleteThis is great! I might employ something similar for all of my boyfriend's man purses - er, luggage and backpacks - that are cluttering up our apt. bedroom hallway.
ReplyDeletethose front facing brackets, do you have a link to them? i can't seem to find them on the ikea site.
ReplyDeletethanks
Thats exactly what I was looking for... Cheap and functional...
ReplyDeleteThanks
So how do you hang a womans bike? (you know, with an angular bar)
ReplyDeleteGreat! Just made one for 2 bikes in my garage. Since the top tubes of my bikes aren't straight, I use tubular webbing from REI and hang the bike on the front facing brackets. Top tube adapter from Yakima/Thule=$36. 6 feet of REI webbing=$1.34.
ReplyDeleteWhere can you buy just 1 Ikea Broder post? Online it shows the Broder Heavy Duty Storage systems as full sets...
ReplyDeleteEdit: found the parts list: ont he Broder page combindations => all parts, thanks!
ReplyDeleteBuilt this bike rack over the weekend - the front facing brackets' design seems to have changed. They no longer have the verticle "tip" at the end, and they now have a flat face on the top, so that you no longer can add an angled piece of 2x4 with slots cut into them as shown.
ReplyDeleteAlso, you would need 3 sets of front facing brackets (1 short, 2 long) to build a stand as pictured - 1 short set for the bike on top, and one long set for each helmet.
I am having a problem with my brackets - they do not fit correctly into the slots. This is due to the extension bar inside the long post. The extension bar has larger slots to be able to allow the brackets to be installed, however they still get in the way and prevent the brackets from lying flat against the long bar, leavinge the brackets slightly angled up and a bit wobbly. I will have to try to fix this with some zip ties or something for added stability.
With the new brackets, it looks like you could custom cut two boards with notches/V-shapes for the bike to rest in, then screw them directly into the bracket with two screws. Looks like it'd be even more secure than the original post if you did it that way.
ReplyDeleteCheers!