
Bathroom and bedroom DIY shabby chic furniture hacks and ideas.
Shabby chic was all the rage in the 80s, an interior decorating style that embraced a warm, lived-in look. Furniture was made to look aged (cue: the distressed painting technique), sometimes even chipped and worn.
All you need is a few cans of paint, sandpaper and some vintage element to give it the added style. And of course, an IKEA piece.
DIY shabby chic furniture pieces is still relatively popular with good reason. Adding one or two selected pieces, mixed in with new decor can give your space a cosy, welcoming vibe. As heartwarming as going home to grandmama’s place.
DIY Shabby Chic Bathroom Vanity Hack
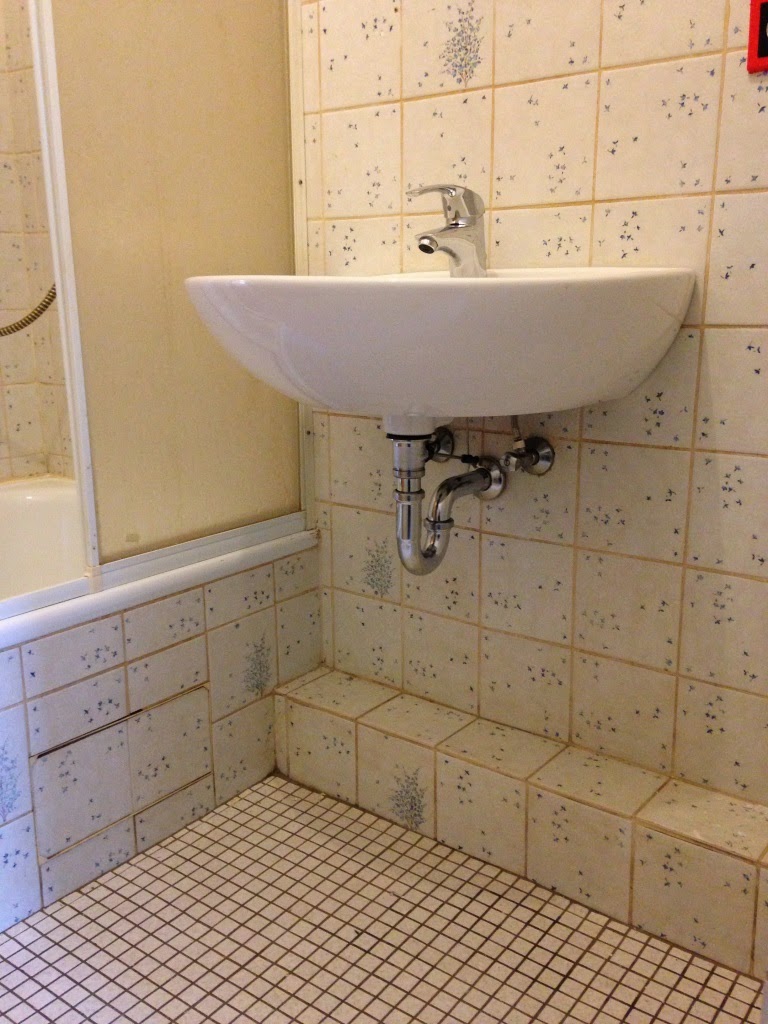
I decided I need a vanity unit underneath my sink but it should match the exact corner of my bathroom so it needed to be custom made.
I was inspired by another RAST Dresser Hack for using as a vanity so I decided to give it a go myself.
I’m also a big fan of shabby chic furniture so the Vanity should also meet this style.
How to hack IKEA RAST to shabby chic bathroom vanity
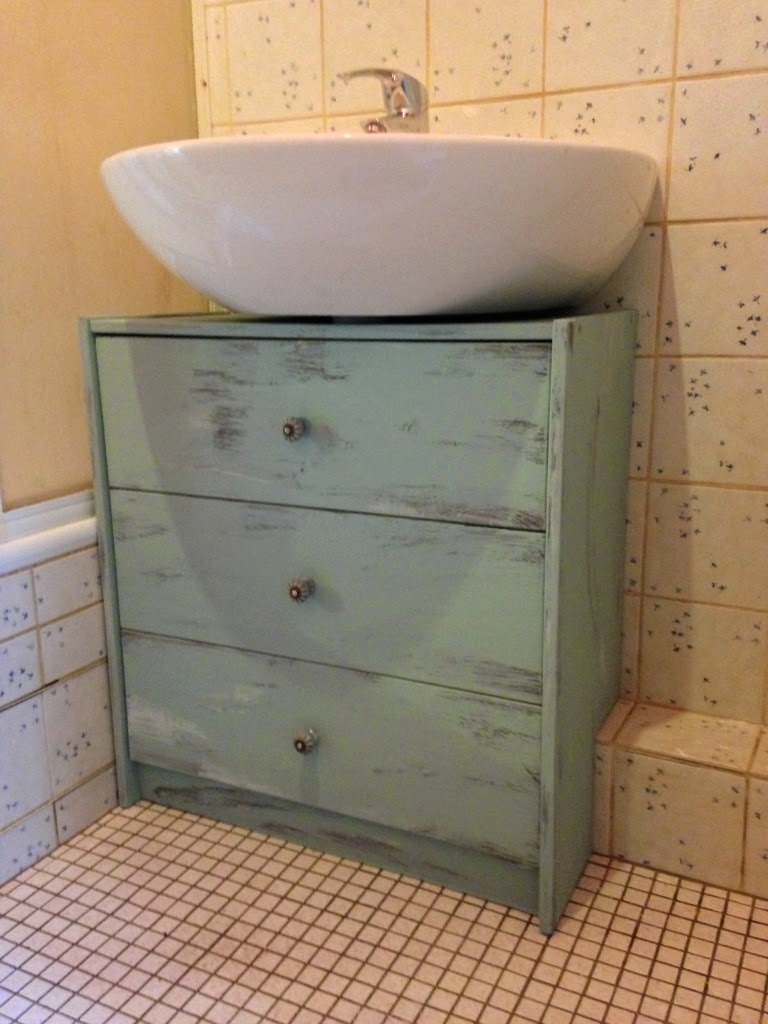
Here’s what I ended up with. And I’m might pleased with the results.
Supplies for shabby chic bathroom vanity hack:
RAST Dresser
Chalk Paint
Sandpaper
File
Putty
Drill
I started off by cutting the RAST to the exact measurements of the corner of my bathroom. It needed to be shortened a few centimeters and the back needed a cutout for a pretty large border underneath my sink. Then I cut a pretty wide hole for the pipes.

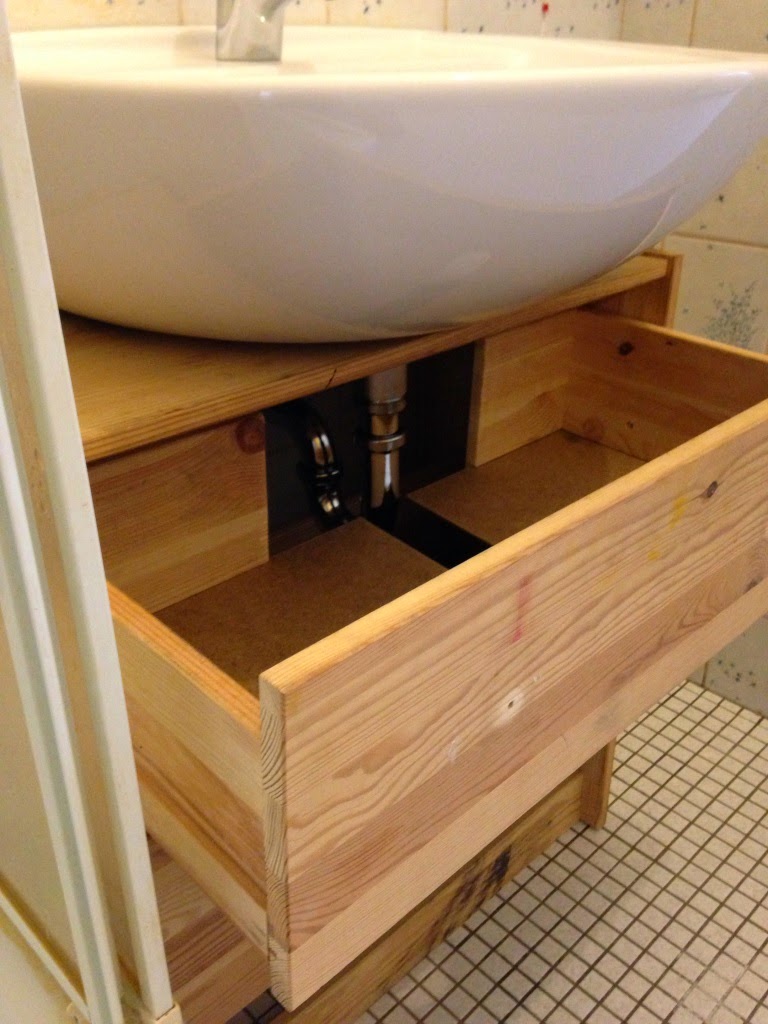
Then the top drawer needed a cutout at the back to fit around the pipes underneath the sink. I just cut out a bit of the backside and the bottom to fit around it.
The middle drawer could be left as it is but the bottom drawer needed to be shortened to half its length so I shortened the sidepieces to half their length and drilled new holes to include the screws for the drawers not to fall out.
Painting and distressing
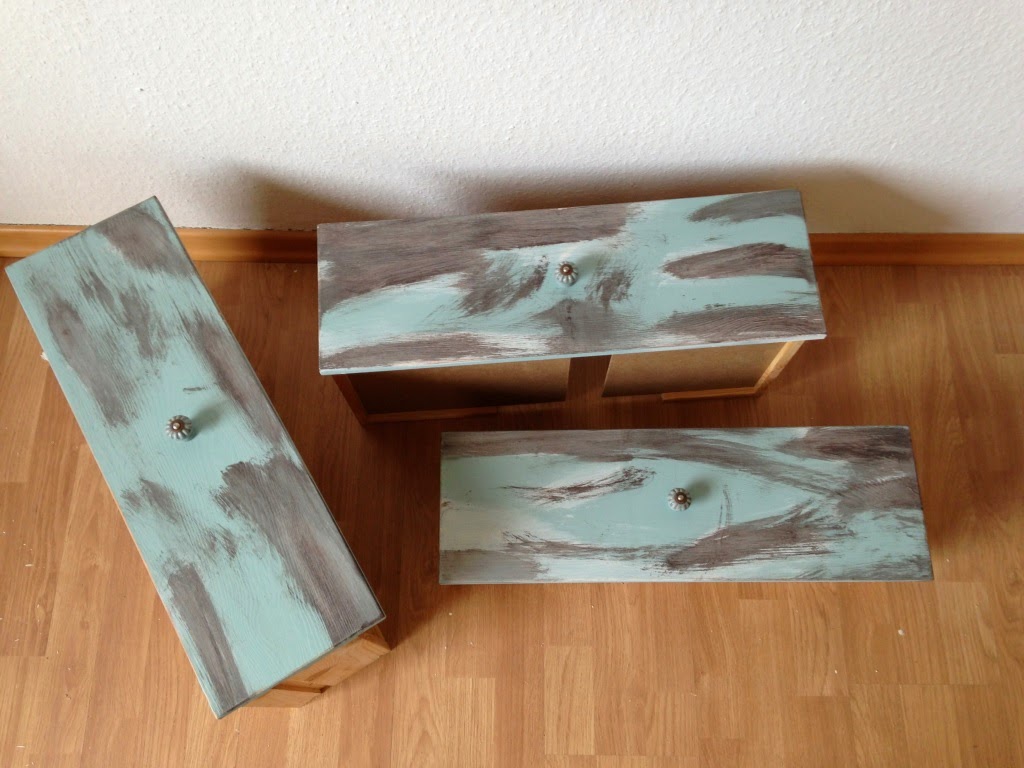
After that I began to paint the whole RAST in a mint green-blue chalk paint. After the first layer of paint, the edges and parts of the sides and the drawers were distressed with sandpaper and a file to give the dresser a used look. Then another layer of paint was applied. After that the distressed parts were painted with a white chalk paint and a black-brown chalk paint which were wiped off right after painting to just apply a hint of the color to the wood. Then a final layer of mint was applied to finish the job.
The pulls were exchanged with some old ceramic pull knobs but unfortunately I only had 4 left so I decided to close the original 6 holes with some putty and drilled new holes in the center of each drawer to hold one ceramic pull knob.
The RAST Dresser now fits my space perfectly and looks just like some very old and much more expensive piece of furniture.
~ by Tobias, Witten, Germany
Shabby Chic bedroom dresser makeover
A plain IKEA RAST 3-drawer pine dresser was the perfect size for a shabby chic French style dresser in our spare bedroom. However, I knew the compact RAST was way too plain for the purpose.

I customized it by:
Gluing on a decorative wooden moulding shape on to each drawer.
I tacked each in place with a thin nail.


Once dried, I painted it all the same colour.
I changed the drawer knobs / pulls to clear glass ones.
My IKEA hack is now perfectly lovely.
See more of the DIY shabby chic furniture dresser on my blog.
~ by Dee Snook, West Midlands
Shabby chic style nightstand
A forgotten pine RAST dresser in the corner gave me a perfect opportunity to try distressed paint technique. I also had a few unwanted incense burners, which I promptly found a way to use in this DIY project.
It’s now perfect for my bedroom as a nightstand and extra storage.

Supplies for distressed dresser:
IKEA RAST chest of drawers
Incense burners
Paint
Brush
Saw
Emery sandpaper for polishing
DIY shabby chic furniture with distressed paint technique:
1. I sanded the whole chest. Then glued the incense ornaments to the middle of the drawer fronts.
2. Driven by a sudden impulse I cut out a pattern from the bottom spacer with a jigsaw, sanded it well and stuck it to the top of the dresser.


3. I painted the whole dresser in light blue, using enamel paint.
4. When dry I used sandpaper to distress certain parts of the furniture. Starting with coarse sandpaper and then finer ones.

See more on my blog.
~ by Laura – Sublót blog, Budapest
