
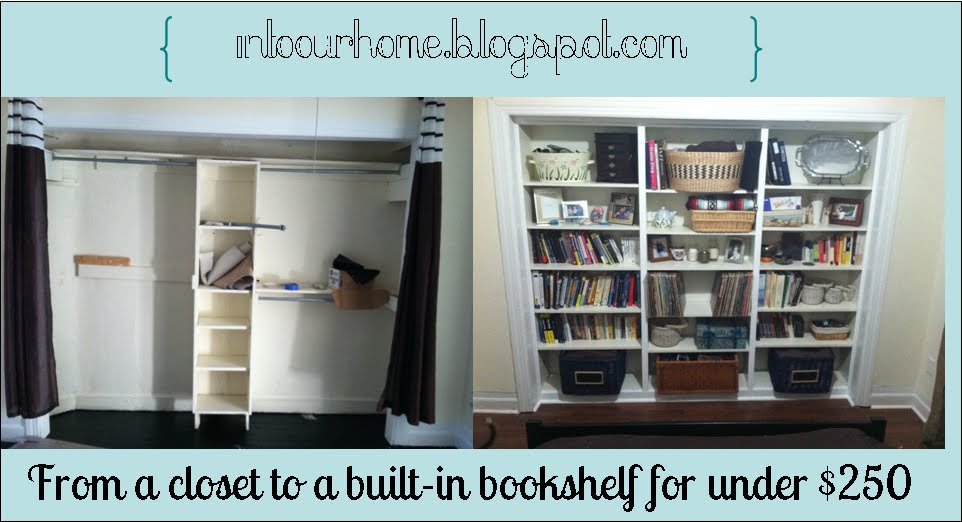
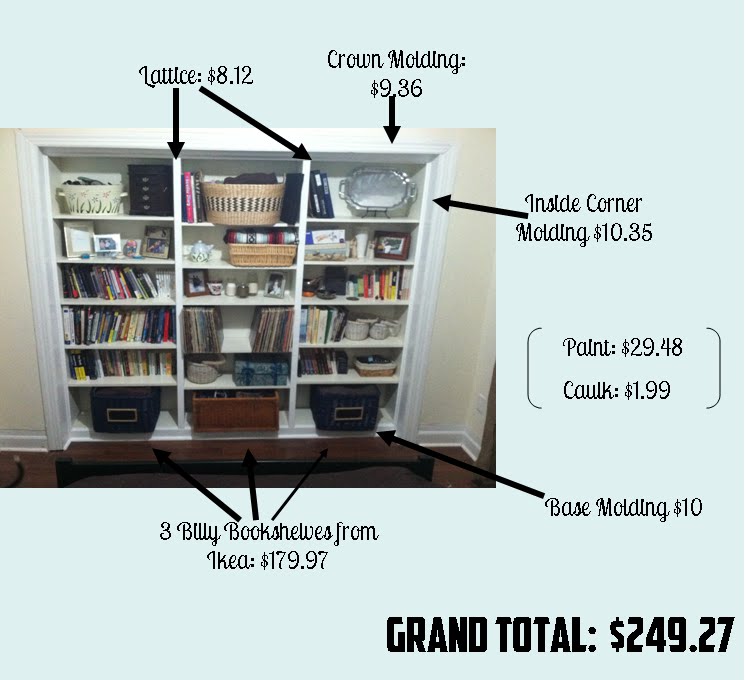
Materials: 3 billy bookshelves, crown molding, lattice, quarter round, base molding, calk, paint, screw drivers, drill, finishing nails (optionl: chalk pro reel set, shims)
Description: Step 1: Clear out the closet if needed and remove doors. We had to remove the poorly installed wood shelves. (It was fun to rip them down!)
Step 2: Put those Billy Bookshelves together. I put all 3 together by myself in under 90 minutes. You will need both a Phillips and flat head screwdriver for assembly.
Step 3: Wedge the shelves in your closet space. A friend is helpful for this maneuver. We were incredibly lucky with measurements. We had about three inches to spare with the bookshelves in the closet. We also had to account for a dip in the floor. We used shims (scrap wood) to keep the shelves level.
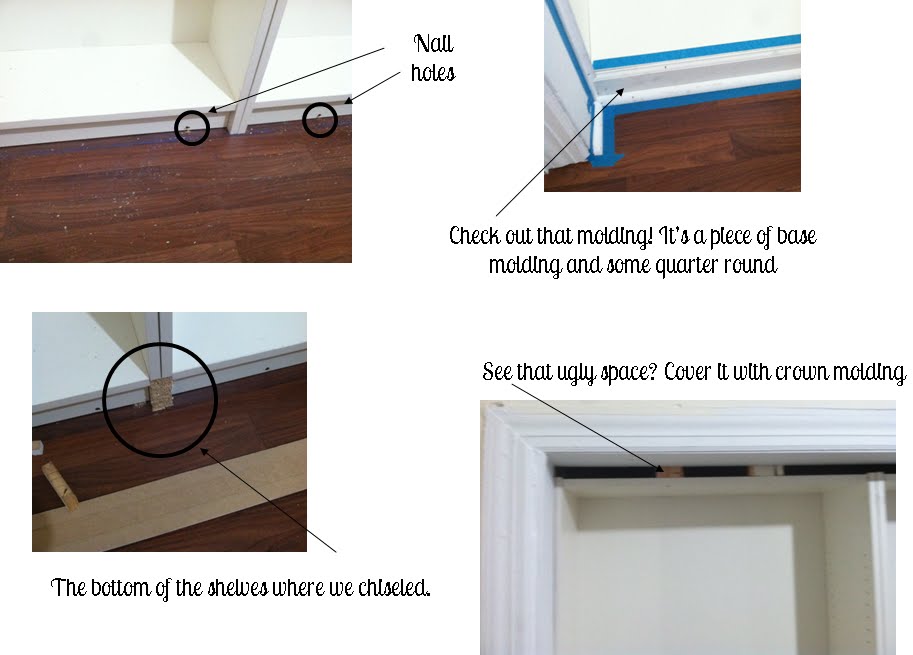
Step 4: We used a chalk line pro-reel to make sure each shelf was lined up on the floor, otherwise the molding would have been a pain! And we nailed the base of the shelves directly into the floor. They are not moving!
Step 5: We used a chisel to make the bottom part of the two ends of the shelves even with the rest of the bottom of the shelf so the base molding could sit in there.
Step 6: Install the lattice where the two book shelves meet to make it look like one piece.
Step 7: Install crown molding above the book shelf. Nail to top of closet or molding around the closet.
Step 8: We installed quarter round on each side to cover an unsightly blemish in the original wood work.

Step 9: Fill in the nail holes with putty or calk and let dry. Then paint.
Step 10: Decorate your new built-in!
See more of the Billy built in.
~ Stephanie Anderson, United States